
How to Use Bikini Wax at Home: A Foolproof Guide for Beginners
*Collaborative Post
Look, bikini waxing at home isn’t rocket science. But it’s also not something you want to wing without at least understanding what you’re getting into. The truth is, most people overcomplicate the process or psych themselves out before they even start. Then they end up with patchy results, unnecessary pain, or worse—they give up entirely and go back to paying salon prices every few weeks. Here’s what actually matters: proper preparation, the right products, and understanding a few key techniques. Get those three things sorted, and you’ll wonder why you ever thought this was complicated.
Why Hard Wax Changes Everything
Before diving into technique, let’s address the elephant in the room: wax type matters more than you think. Soft wax requires strips and grips both your hair and your skin. That’s fine for legs, but on sensitive areas like the bikini line? It’s asking for trouble. Hard wax works differently. It shrinks as it cools, gripping only the hair itself. You peel it off directly—no strips needed. For delicate skin with coarse hair (which pretty much describes the bikini area), this is the only sensible choice.
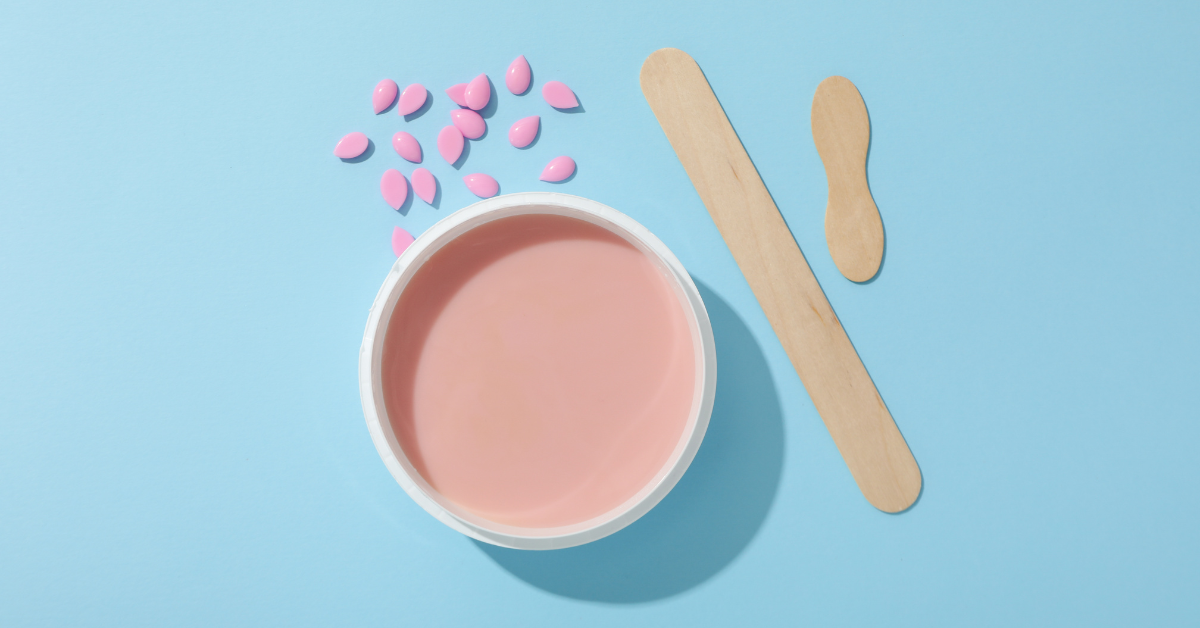
The Wax Bead Advantage
Within the hard wax category, beads are worth calling out specifically. They melt evenly in a warmer, apply smoothly without clumping, and remove cleanly without leaving residue all over your bathroom. For anyone dealing with extremely sensitive skin or tackling a Brazilian for the first time, high-quality wax beads for extremely sensitive areas make the experience considerably less traumatic.
Getting Your Setup Right
You can’t just buy wax and hope for the best. The difference between “this is manageable” and “never doing this again” often comes down to having the right tools ready.
Essential Equipment
- Digital wax warmer with temperature control—guessing with a microwave leads to burns
- Wooden spatulas for application (buy extras, you’ll go through them)
- Pre-wax cleanser without fragrance or oils that prevent wax adhesion
- Post-wax soothing product like aloe vera gel or a specialized calming oil
- Powder (cornstarch works) for skin that tends toward oily or sweaty
- A decent mirror positioned at an angle where you can actually see what you’re doing
The warmer matters more than people realize. Wax that’s too hot burns. Too cool, and it won’t grip properly. Digital controls eliminate the guesswork.
Pre-Wax Preparation: The Boring Stuff That Actually Matters
Most failed attempts happen before the wax even touches skin. Skip these steps at your peril.
Hair Length and Timing
Your hair needs to be between 3-6mm long. That’s about 1/4 inch—roughly the length of a grain of rice. Too short and the wax can’t grip it. Too long and you’re adding unnecessary pain plus risking breakage instead of root removal. If you’ve been shaving, wait at least two weeks before attempting to wax. Yes, that’s uncomfortable. No, there’s no shortcut.
Exfoliation and Cleansing
Exfoliate 24-48 hours before waxing, not the same day. This removes dead skin cells that might trap hair, but gives your skin time to calm down before the main event. On wax day, cleanse the area with a gentle, fragrance-free cleanser. Make sure everything is completely dry. Oil-free is critical—even natural body oils can prevent proper adhesion.
Strategic Timing
For anyone who menstruates, skin sensitivity peaks right before and during your period. Schedule waxing at least a week after your period ends if possible. The difference in pain levels is noticeable.
The Actual Waxing Process
Alright, equipment ready, skin prepped. Time for the main event.
Heat Management
Melt your wax to a honey-like consistency. Not runny, not thick—somewhere in between. Test a small amount on your inner wrist before going anywhere near your bikini line. If it’s uncomfortable there, it’s definitely too hot for more sensitive areas.
Application Technique
Apply wax in the direction of hair growth using a wooden spatula. Spread it about 1-2mm thick—thick enough to grip the hair but not so thick it becomes difficult to remove. Leave a little “lip” or edge at the end that you can grab. Work in small sections. Trying to tackle too much area at once is how people end up with half-removed wax and a lot of regret.
The Critical Part: Removal
Wait 20-30 seconds for the wax to set. It should feel pliable but not sticky when you touch the edge. Hold your skin taut with one hand—this isn’t optional, it significantly reduces pain and prevents bruising. Here’s where most people mess up: pull parallel to your skin, not up and away from it. Fast and firm, in the opposite direction of hair growth. Hesitating makes it worse.
Starting Points
For a basic bikini line cleanup, start at the outer edges and work inward. For anything more involved, the strategy shifts—alternate sides, working from outside toward the center, always maintaining that taut skin and parallel pull technique.
Managing Pain Without Overthinking It
Let’s be honest: it’s not comfortable. Anyone claiming bikini waxing is painless is either lying or has dramatically different nerve endings than the rest of us. But pain management isn’t about topical numbing creams (which mostly don’t work well for this anyway). It’s about: Breathing deeply and consistently instead of holding your breath. Tension amplifies pain. Distraction through music or a podcast. Your brain can only focus on so many things at once. Small sections with breaks between them rather than trying to power through everything at once. Quality products that grip hair without traumatizing skin. The difference between bargain wax and properly formulated hard wax beads isn’t subtle. First-time waxing always hurts more than subsequent sessions. Your hair follicles get weaker with each wax, and you get better at technique. That first time? Just accept it’s going to be rough and push through.
Post-Wax Care: Don’t Screw This Up
You’re not done yet. The 24-48 hours after waxing determine whether you get smooth results or deal with irritation and ingrowns.
Immediate Aftercare
Apply a soothing gel or oil right away. Aloe vera is classic for a reason. Avoid anything with alcohol or fragrance that’ll irritate freshly waxed skin. No hot showers, baths, saunas, or swimming pools for at least 24 hours. Heat and moisture are invitations for bacteria to cause problems. Skip the gym. Sweat + friction + open follicles = potential infection. It can wait a day. Wear loose, breathable clothing. Now is not the time for tight jeans or synthetic underwear.
Long-Term Maintenance
Start gently exfoliating again after about three days. This prevents ingrown hairs by keeping dead skin from trapping new growth. A couple times per week is sufficient—daily scrubbing is overkill that’ll irritate your skin. Moisturize regularly with a fragrance-free lotion. Keeping skin hydrated helps maintain smoothness between waxing sessions.
Troubleshooting Common Problems
When wax won’t grip properly, the issue is usually hair length (too short or too long), oily skin (powder fixes this), or insufficient cleansing before starting. Redness and irritation immediately after waxing is normal. Apply a cool compress and soothing gel. If it persists beyond 48 hours or worsens, that’s when you need to worry. Ingrown hairs typically show up a week or two post-wax. Prevention through regular exfoliation beats treatment. If you’re prone to them, consider a post-wax serum specifically formulated to prevent ingrowns. Burns from wax that’s too hot are entirely preventable. Test temperature, use a proper warmer with controls, and never rush the melting process. Missed spots or uneven results usually come down to poor visibility (get that mirror positioned right) or working in sections that are too large. Go smaller, take your time.
When to Choose Professional Over DIY
Look, at-home waxing isn’t for everyone or every situation. Your first Brazilian ever? Consider having a professional do it so you understand what proper technique feels like. After that, you can replicate it yourself. If you have active skin conditions, extremely sensitive skin prone to keloids, or any contraindications like recent chemical peels, don’t mess around at home. The money saved isn’t worth potential complications. For ongoing maintenance of basic bikini lines though? At-home makes complete sense once you’ve got the technique down. The cost savings alone—potentially hundreds per year—make the learning curve worthwhile.
The Honest Reality Check
There’s a learning curve. Your first attempt probably won’t be perfect. You might miss some spots, the pain might surprise you, or you’ll realize halfway through that your mirror placement is terrible. That’s fine. Everyone who’s good at this now was terrible at it once. The key difference between people who succeed at home waxing and those who give up after one attempt? The successful ones expected imperfection, learned from mistakes, and tried again. By attempt three or four, most people have the process dialed in. Hard wax formulated for sensitive areas, proper technique, realistic expectations, and patience with yourself during the learning phase. Get those sorted, and bikini waxing at home becomes just another routine grooming task—cheaper, more convenient, and entirely manageable.
*This is a collaborative post. For further information please refer to my disclosure page.
Related Posts:
Loss of Earnings After a Car Accident: Pursuing Compensation

In Texas, the aftermath of a car accident extends beyond physical injuries, as demonstrated by the recent increase in motor Read more
Arts, Crafts and Messy Play Ideas
Jake has really started to get into arts and crafts this year which has meant I have learnt to hunt Read more
How To Give Your Nursery The Wow Factor

*Collaborative Post One of the most exciting parts of welcoming a new baby is getting to decorate the nursery. Making Read more
Reasons Running A Care Home Could Be Right For You

Perhaps running a care home isn’t the most glamorous. However, one could argue that it’s one of the more essential Read more