

How To Make A Wise Man Outfit For The Average Parent
*Affiliate Links
I am far from being a ‘Pinterest Mum’. I mean, I give things a fair good go but they usually turn out well, um, let’s say less than perfect… Just check out my, er, Halloween pumpkin cupcakes I attempted last year. They certainly didn’t look like this on Pinterest and these definitely didn’t end up at the school fair!

So, when the school said that Jake needed to go as a wise man for one of their lessons I thought to myself ‘hey, I don’t need to spend any money, I can make an outfit!’ (I know, I know, I just can’t stop these daft ideas!)
I asked over on Instagram how I could go about this and there were a few good suggestions so I had a little look around the house, a little look at images on the internet and then decided to give you a point by point blog on how to make this Wise Man outfit for the average parent; the parent who wants to give it a go but isn’t always too sure, the parent who isn’t overly fussed by perfection and the parent who loves doing these crazy things for their kids. So here goes:
What you will need:
- Patience
- Lots of cups of tea
- Pair of scissors
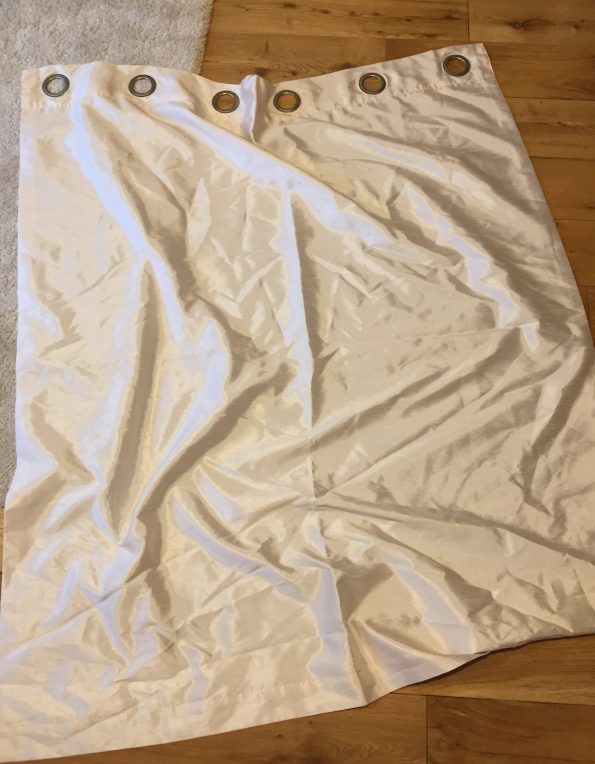
- Some old curtains (or other material)
- A whole afternoon
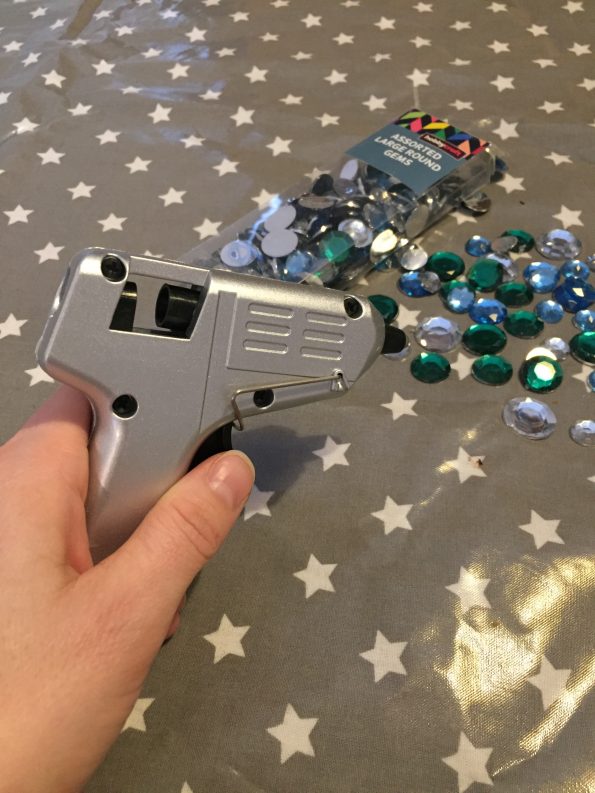
- Glue gun
- Gems
- Headband
- Good sense of humour
What you will not need:
- Expert crafting skills
- Chalk
- Professional fabric scissors (although they would help)
- Sewing machine
- A good eye for detail
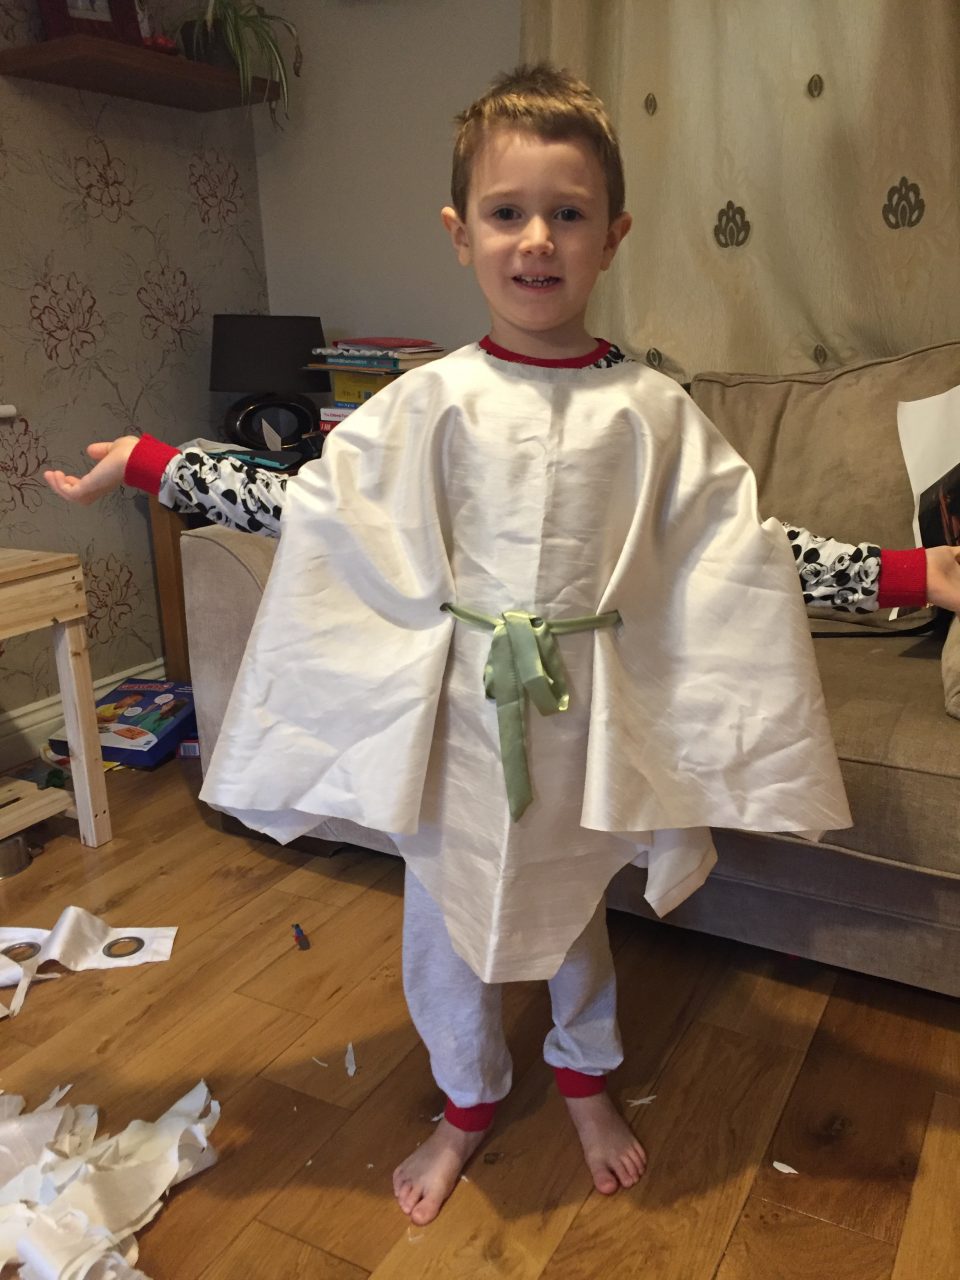
1. Find a suitable item to make the body of the outfit
Old curtains for me but a sheet, an old dress, a duvet cover etc. would also work fine I should imagine.
2. Get Cutting!
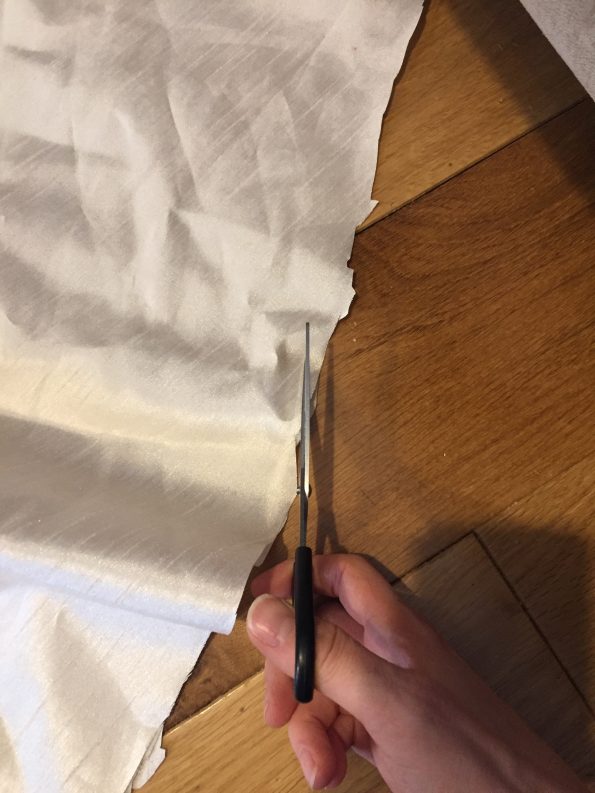
This is not going to be at all technical. Grab a pair of scissors, any scissors that will cut through fabric are fine. I do not own proper scissors for anything like this and used the dog hair ones! I found that ordinary kitchen scissors wouldn’t cut through the fabric though so you will need something sharper.
Firstly, cut off the curtain ring area. I didn’t worry about making the lines super straight and it didn’t affect the overall look.
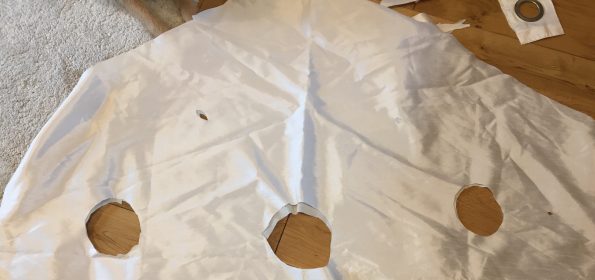
Next, fold the curtain in half and roughly guesstimate where the middle is. This is going to be where your child’s head will need to come through. Cut a semi-circle (I did a rough guess for size) and then open the curtain back up to see how if the hole is big enough. If you go wrong, just try again – luckily curtains come in pairs!
Next, ask your child to pop the curtain on and get them to lift their arms a little. From this, you can guesstimate where their armholes will need to go. Take your scissors and very carefully cut very small semi-circles and then test the size using your child. You want enough room for movement and for their arms to be able to lift up.
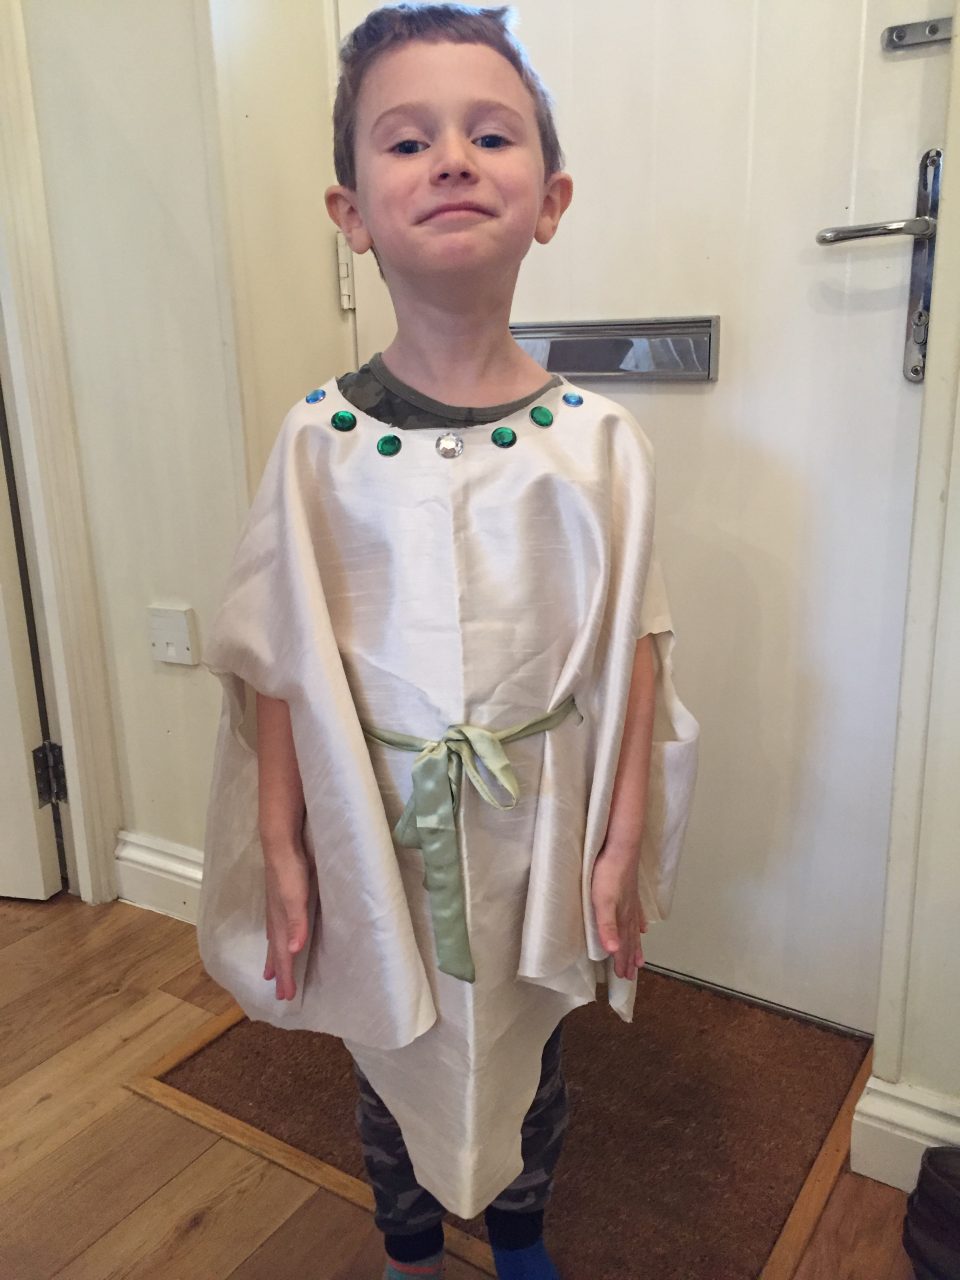
3. Tie Around
Have a look around your home for some sort of fabric, rope, tie, belt etc. that would be suitable for the tie around the outfit. I found an old silk belt from a dressing gown which was actually perfect. It’s amazing what you can find in drawers, cupboards or the fancy dress box!
With your child back in the Wise Man outfit, guesstimate again where the holes for your tie around needs to go.
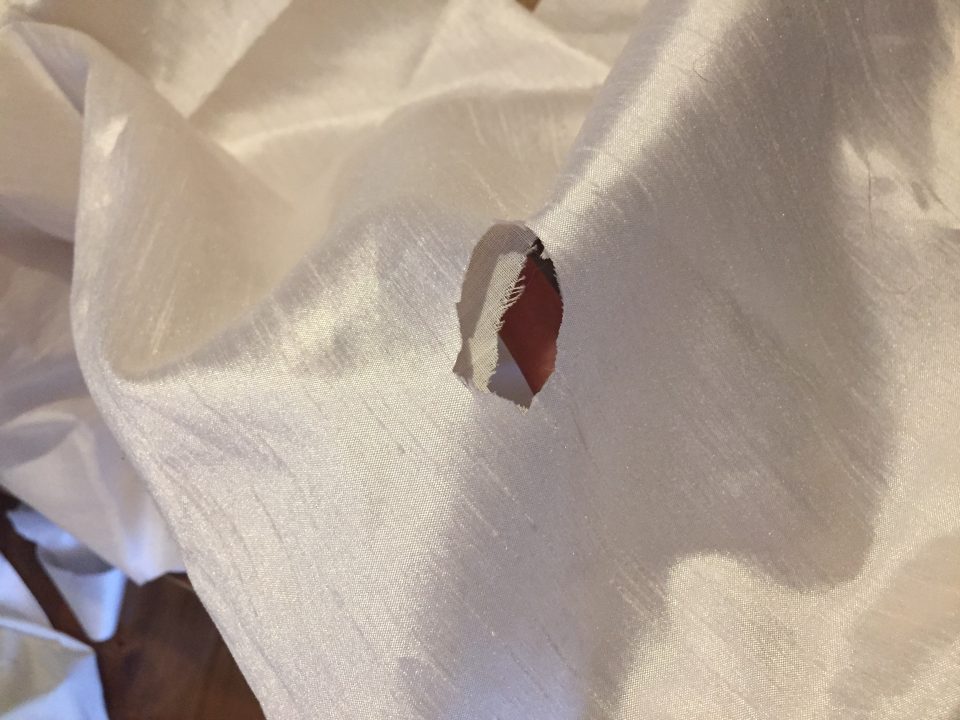
Make an even smaller semi-circle cut-out with your scissors and check if the tie fits through. Using your hand, roughly work out where it needs to come through on the other side and make another hole. Thread this through and around the child’s back and make two more holes to go back around to the front (I hope that makes sense?)

4. Tidy Up
Once on and tied up, you will be able to see what shape the outfit is and from here you can just chop away to get your desired shape. I did part of this on the child and then ‘tidied it up’ afterwards.
5. Finishing Touches
A glue gun is a really handy tool to have for this. We didn’t own one but I found one in Hobbycraft for a fiver along with some gems. Arrange a nice pattern around the neckline using the gems (or whatever else you have chosen) and then get sticking. If you don’t have a Hobbycraft nearby, I also found these gems on Etsy.

6. Check the Child is Happy
This is a very important part because you know how they can suddenly change their minds, hate it and refuse to wear it. Have them try it on several times and take photos of them to show them how brilliant they look!

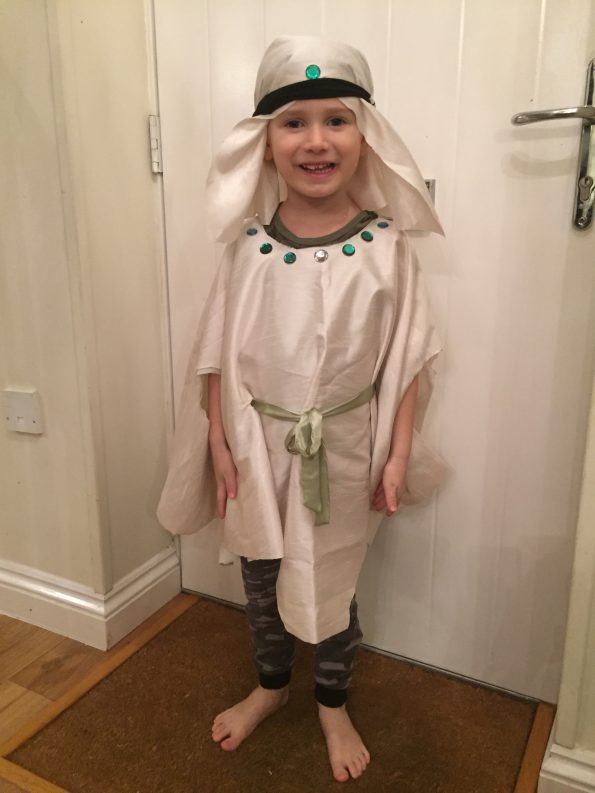
7. Make a Headdress With the Remaining Material
Because you haven’t quite done enough today and you are a glutton for punishment (plus you don’t own anything else or a crown) you can now fashion a type of Wise Man headdress out of the rest of the material. Place the material over the child’s head and ask them to be completely still.
You want to cut an angled shape at the front of the head so the curtain sits nicely across the hairline whilst coming down around the rest of the head. For added pazazz, you could glue another gem to the front of the headdress.
Then find/use an old headband or sweatband to keep the material in place. Check how the fabric is sitting on their head, remove any bits that may tickle their face and again check the length looks good all the way around the back. Just trim away with the scissors if you feel it needs to be shorter or tidier.
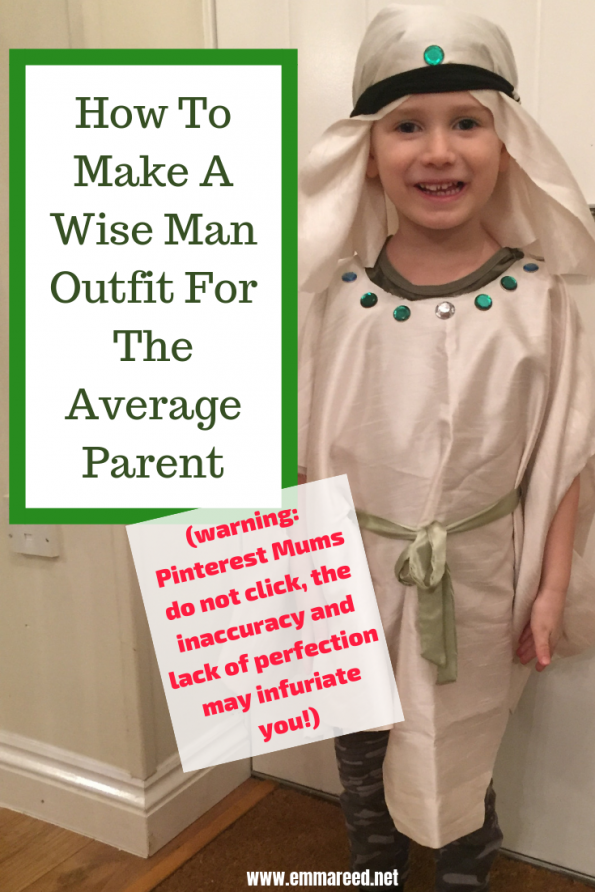
And, voila! You are finished.
One Wise Man outfit:
I hope you enjoyed my pointers for making a Wise Man outfit for your child for the average parent and I hope you too can now go ahead and make an outfit you can also be proud of!

You May Also Like:
Pin for later:
Related Posts:
How to Create Spooky Halloween Costumes on a Budget

Halloween is right around the corner and it is one of my favourite times of year. That autumnal feel, the Read more
How We Do a Secondhand Christmas

We all know the Christmas season can be expensive, but for our family, it can be even more challenging. With Read more
Review | Bring A Little Christmas Magic With Lapland Letters

*Ad Christmas is a very special time in our household and not just because we have 2 boys who get Read more
Christmas is NOT a Competition, Don’t Let It Overwhelm You

Over the last week or so I have become more and more enraged as the Christmas season has gradually crept Read more